
Step-by-Step Flying Geese Tutorial: Traditional and No-Waste Techniques
This post may contain affiliate links, meaning I’ll receive a commission if you purchase through my links, at no extra cost to you. Please read full disclosure for more information.
Flying Geese units are a cornerstone of quilting. These versatile rectangles with two triangles on the ends can be the building blocks of countless quilt designs. On their own, they might not seem like much, but when you start putting them together, their impact becomes undeniable!
Because Flying Geese are so versatile, you’ll see them used frequently in quilting patterns.
Like, a lot. A lot.
In fact, Flying Geese may be one of the most common units in quilt making, right up there with Half Square Triangles! That’s why it’s crucial to learn how to make them. Fortunately, they’re easy to create and a fantastic skill for any quilter to master.
There are several methods for making Flying Geese, each with its own benefits. Whether you’re making one at a time, or cranking out four at once with no fabric waste, you’ll find the right method for your project here. Let’s dive into the details!
Traditional “Stitch & Flip” Flying Geese (One at a Time)
This is the most straightforward method for making Flying Geese, and it’s perfect for when you need just a few units for a project. Plus, it’s easy to remember and ideal when working with pre-cut fabrics like charm packs or layer cakes.
Step-by-Step Instructions:
1. Draw a diagonal line on the wrong side of (2) squares.
2. With right sides together, pair (1) marked square with (1) rectangle. Sew along the marked line.
4. Trim 1/4″ away from the sewn line, then press.

5. Repeat Steps 2-4 with the second square on the opposite side of the rectangle.

And there you have it—a perfect Flying Geese unit!
Beginner Quilter Tip: If you’re worried about accuracy, try starting with squares that are just a touch bigger than your desired size, then trim the Flying Geese to perfection after sewing. This will give you some extra wiggle room for a more precise finish.
Four-at-a-Time, No-Waste Flying Geese
If you’re working on a larger project or just want to save time and fabric, the four-at-a-time, no-waste method is a game-changer. This method produces four identical Flying Geese units without any fabric waste.
Step-by-Step Instructions:
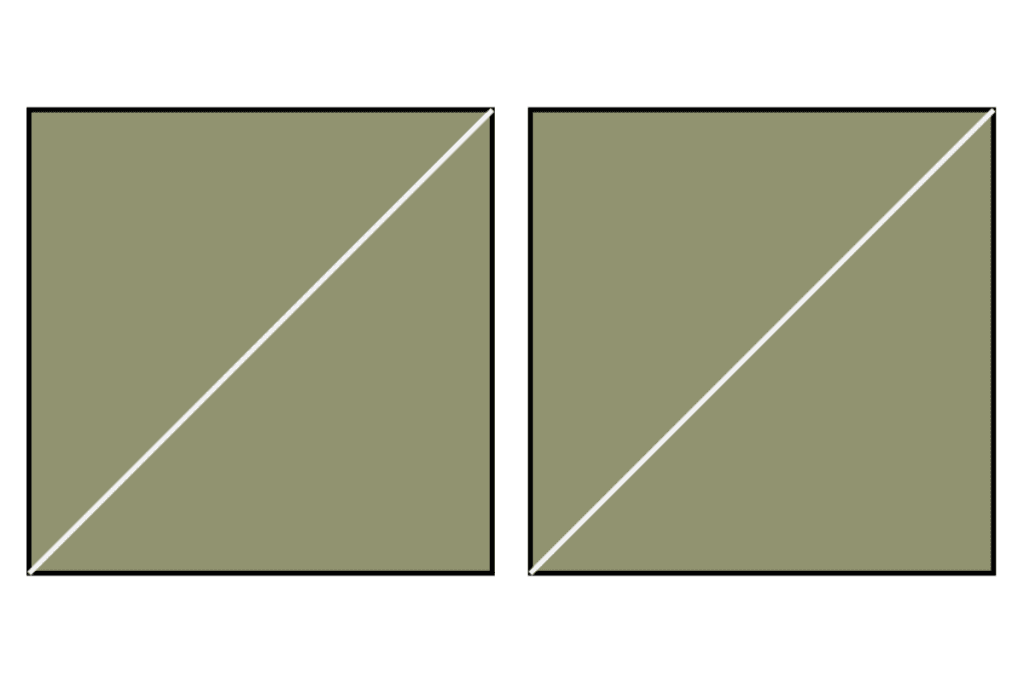
1. Draw a diagonal line on the wrong side of (4) small squares.

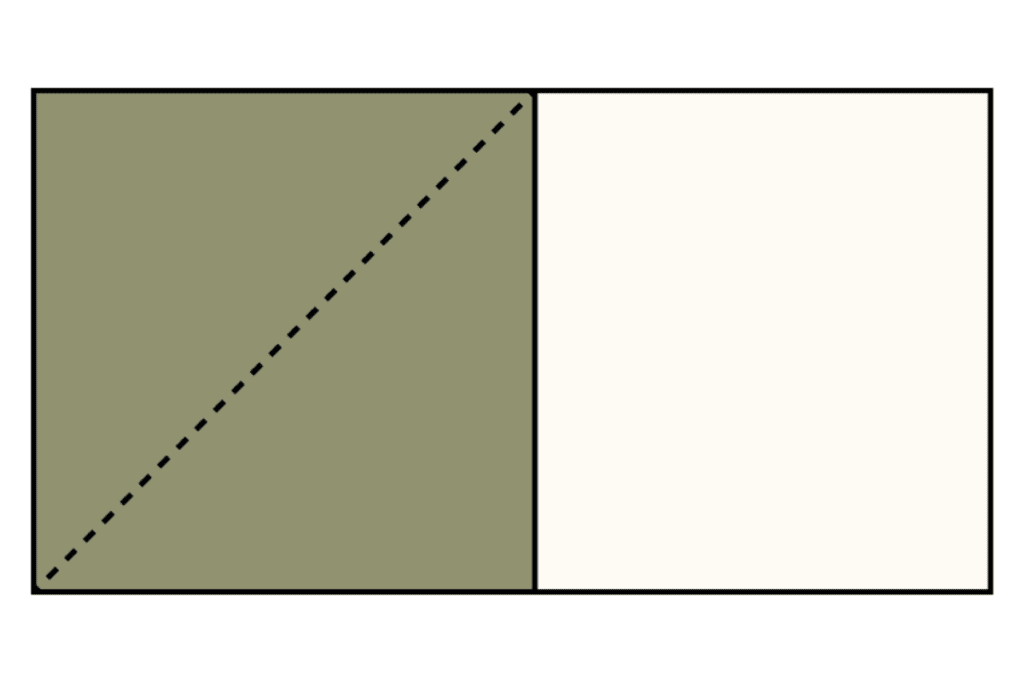
2. With right sides together, pair (2) marked small squares with (1) large square.
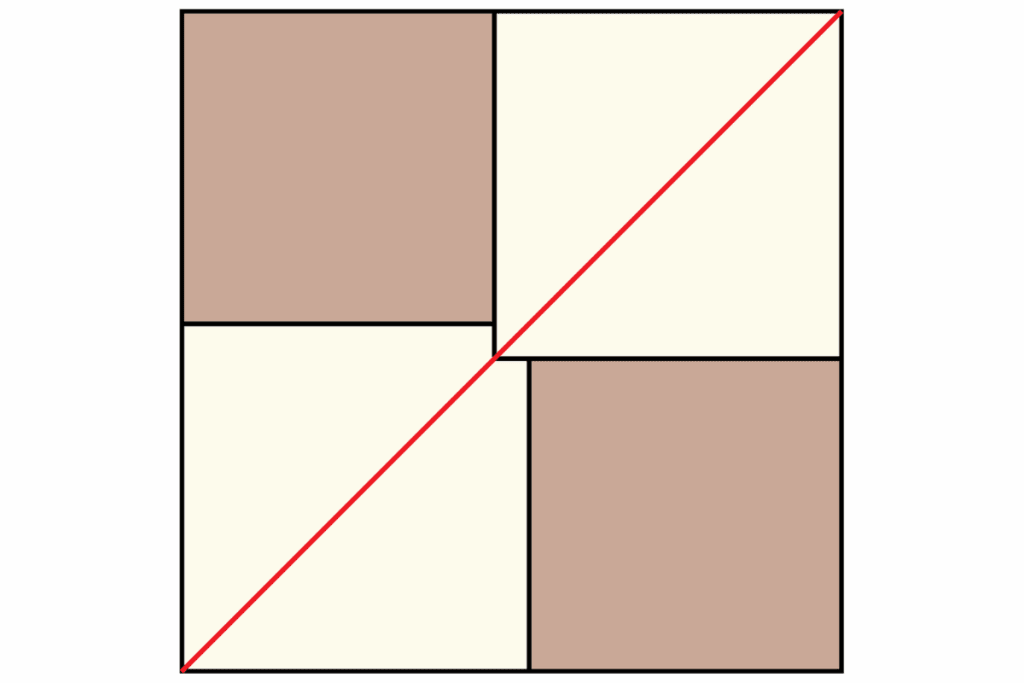
3. Sew 1/4″ away on both sides of the marked line then cut along the marked line.

4. Press the partial FG pieces open. Place a marked small square in the corner of each Partial FG piece.
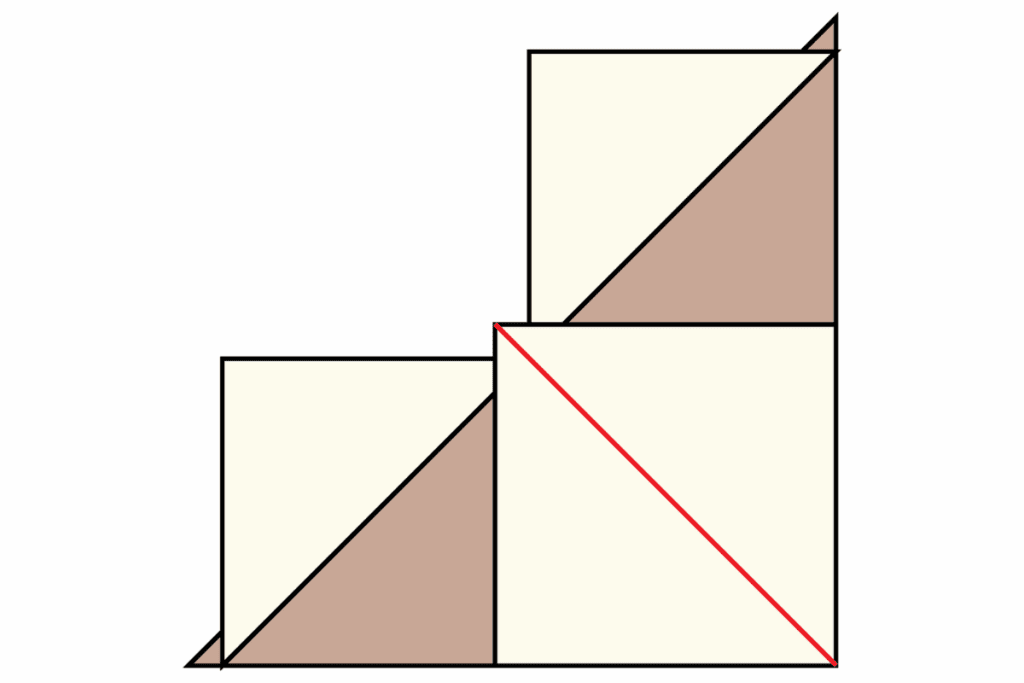
5. Sew 1/4″ away on both sides of the marked line then cut along the marked line to get (4) FG units. Press and trim to desired size.

Helpful Tip: Be mindful when pressing your seams, as this method creates bias edges that can easily stretch. Press the seams gently without pushing the fabric, to maintain the shape of your units.
Tips for Making Accurate Flying Geese
- Cutting Accuracy: Accurate cutting is the first step to perfect Flying Geese. Make sure your squares and rectangles are cut precisely—this will save you a lot of headaches later.
- Use a Specialty Ruler: There are specialty rulers designed just for Flying Geese, like the Bloc-Loc Flying Geese ruler. These tools can help you trim your units to perfection quickly and easily.
- Chain Piecing: If you’re making a lot of Flying Geese, try chain piecing. Sew all your units in a continuous chain without cutting the thread between them. This saves time and thread, speeding up your quilting process.
- Rotating Cutting Mat: When trimming Flying Geese units, a rotating cutting mat can be a huge time-saver. It allows you to trim without moving the fabric, keeping everything aligned and accurate.
Whether you’re making Flying Geese one at a time with the traditional stitch-and-flip method or cranking out multiples with the four-at-a-time, no-waste method, these units are an essential part of quilting.
By following these steps and tips, you’ll be able to create perfect Flying Geese every time, ready to be arranged into stunning quilt designs!